Installing a Power over Ethernet (POE) camera system is one of the most efficient ways to secure your property. Unlike traditional setups that require separate power and data cables, POE cameras simplify installation by transmitting both through a single Ethernet line. This design not only reduces clutter but also minimizes potential points of failure. Many homeowners and businesses prefer POE systems for their reliability, image quality, and long-term scalability.Before jumping into installation, proper planning is essential. From identifying coverage areas to choosing the right equipment, every step ensures your surveillance system performs at its best. Following best practices during setup—such as clean cabling, strategic mounting, and weatherproofing—will extend the lifespan of your system and improve day-to-day usability. This guide will walk you through the key steps, offering practical tips that make your installation smoother, more reliable, and easier to manage over time.
Planning Your Camera Layout
Identifying critical coverage zones
Begin by mapping out your property. Entry points, driveways, garages, and backyard areas are high-priority locations. Consider both front-facing and hidden access points, since intruders often target less visible spots. By prioritizing these zones, you can maximize coverage while reducing the number of cameras required.
Height, angle, and line-of-sight considerations
Placement determines effectiveness. Ideally, cameras should be mounted between 8–10 feet high. This height discourages tampering while capturing facial details clearly. Tilt cameras downward to cover ground activity, and avoid positioning them directly against reflective surfaces such as windows. Clean lines of sight reduce blind spots and improve detection.
Accounting for future expansion
Think beyond immediate needs. If you may add more cameras later, plan layouts with scalability in mind. Consider running extra cabling now or reserving strategic mounting points for future use. This foresight prevents major rewiring later and ensures your system can grow with your security needs. A forward-thinking layout saves time, cost, and frustration.
Choosing the Right Equipment
POE switch vs POE injector
A POE switch is ideal if you’re connecting multiple cameras, since it supplies power and network connectivity through a single device. For smaller setups with one or two cameras, a POE injector may be sufficient. Choose based on the size and growth potential of your system.
NVR compatibility and capacity
Network Video Recorders (NVRs) act as the brains of your system. Ensure your NVR supports the resolution and frame rates of your chosen cameras. Check storage capacity too, since higher-resolution footage consumes more space. A well-matched NVR ensures smooth recording and reliable playback.
Cable types (Cat5e, Cat6) and cable length limits
Ethernet cables play a huge role in system performance. Cat5e is cost-effective and works well for most installations, but Cat6 offers better shielding and higher speeds. Keep cable lengths under 100 meters (328 feet) to avoid signal loss. Choosing quality cables ensures stable data flow and uninterrupted surveillance.
Cable Routing and Protection
Avoiding interference and power lines
When routing cables, avoid running them parallel to electrical wiring. Electromagnetic interference can degrade video quality or disrupt connections. Maintain separation between Ethernet cables and high-voltage lines whenever possible.
Using conduits, clips, and protective sleeves
Protect exposed wiring with conduits, clips, or sleeves. These prevent accidental damage and make installations look tidy. Cable clips also help with organization, reducing stress on connectors and extending the life of your wiring. Neat cabling improves both safety and aesthetics, especially in visible areas.
Sealing outdoor penetrations
When routing cables through walls, use weatherproof seals to protect entry points. Moisture infiltration can damage cables or weaken connections over time. Outdoor-rated gaskets, sealants, or junction boxes help maintain performance in rain, heat, and snow. Proper sealing keeps your installation secure and extends the lifespan of both cabling and devices.

Mounting the Cameras Securely
Bracket types and surface mounting
Different brackets suit different environments. Wall mounts work well for side views, while ceiling mounts provide overhead coverage. Ensure you choose hardware compatible with both your camera and the surface material. Use anchors or screws appropriate for brick, wood, or concrete.
Ensuring stable attachment and weatherproofing
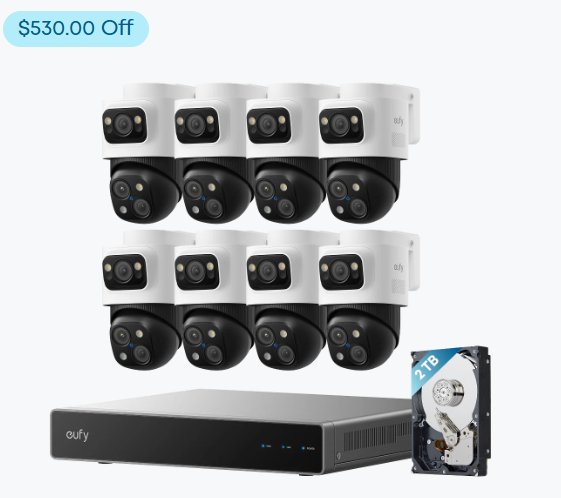
Stability is crucial. Loose mounts create shaky footage and reduce clarity. Check that cameras are tightly fastened and protected with weatherproof housings if outdoors. Some models, like eufy’s outdoor POE cameras, include durable housings and flexible mounting accessories that simplify installation. A secure mount ensures reliable footage and reduces the need for adjustments later.
Conclusion
A well-installed POE camera system offers reliable, long-term protection for your property. By carefully planning layouts, selecting quality equipment, routing cables properly, and mounting cameras securely, you create a surveillance system that is both effective and durable. Every detail, from cable choice to mounting height, influences the clarity and stability of your footage. Taking the time to install correctly ensures fewer technical issues and more peace of mind. Whether you’re protecting a home or business, following these steps will help you get the most from your POE network cameras. With thoughtful setup, your system will deliver clear video, smooth operation, and dependable security coverage day and night.


